Tuesday, October 23, 2012

[Box Joint Jig] - Final Assembly

Over the weekend I was able to complete the micro-adjustment feature on the Box Joint Jig. I have to admit, I never thought building a jig could be this complex, or this fun! There were many new techniques I'd never tried, and many challenges as well. All the better. Hopefully, I will get many good years out of this jig and the work I put into it will pay off.

First, I milled a small piece of hard Maple down to size. Believe it or not, this was a new skill learned. I'd never ripped anything down to 1/4" thickness on the table saw. I'm a hand tool guy! I would have ripped it by hand normally. But I'm going with the machine thing. A home-made (sacrifical) push stick was really handy to make this cut. Next I drilled holes on the drill press for the micro-adjustment mechanism as per the plan. 


I then marked the hole locations and made a simple square right-angle jig (another jig for making a jig) that I could attach to the Box Joint Jig in order to hold it upright on the drill press table for drilling holes for the micro-adjuster rods in the end grain. These holes need to be good and straight as they are 2" deep. 


A near disaster occurred when attempting to install the threaded inserts used to accept the threaded rod. The threaded insert has what looks to be a notch meant for a screwdriver, when in actuality its purpose is to allow the insert to seat itself straight. So I wound up installing it incorrectly the first time.Thank goodness when I flipped it the right way it went in straight and held properly.

I installed it the correct way by screwing the insert into the threaded rod and then then held it in place with a few nuts. I took the threaded rod and chucked it up in the drill press. Then, it was a simply a matter of aligning the pilot holes with the threaded inserts and using hand power and a little downward pressure to screw in the insert.   

Yet another skill learned.  

One other thing to keep in mind. If you order the hardware kit from Shop Notes, make sure you measure the length of the adjuster rods they give you. I spent "waaayyyy" too much time trying to figure out why the jig wasn't adjusting properly. It turned out the the adjustment rods that came with the kit were 2" longer than the length required. Once I cut them to the right size, no problems.

Here's a side view of the micro adjuster mechanism. Works beautifully.

And a shot of the back. The last step is to attach the jig to the miter gauge. I'll do that on the Saw Stop at class.
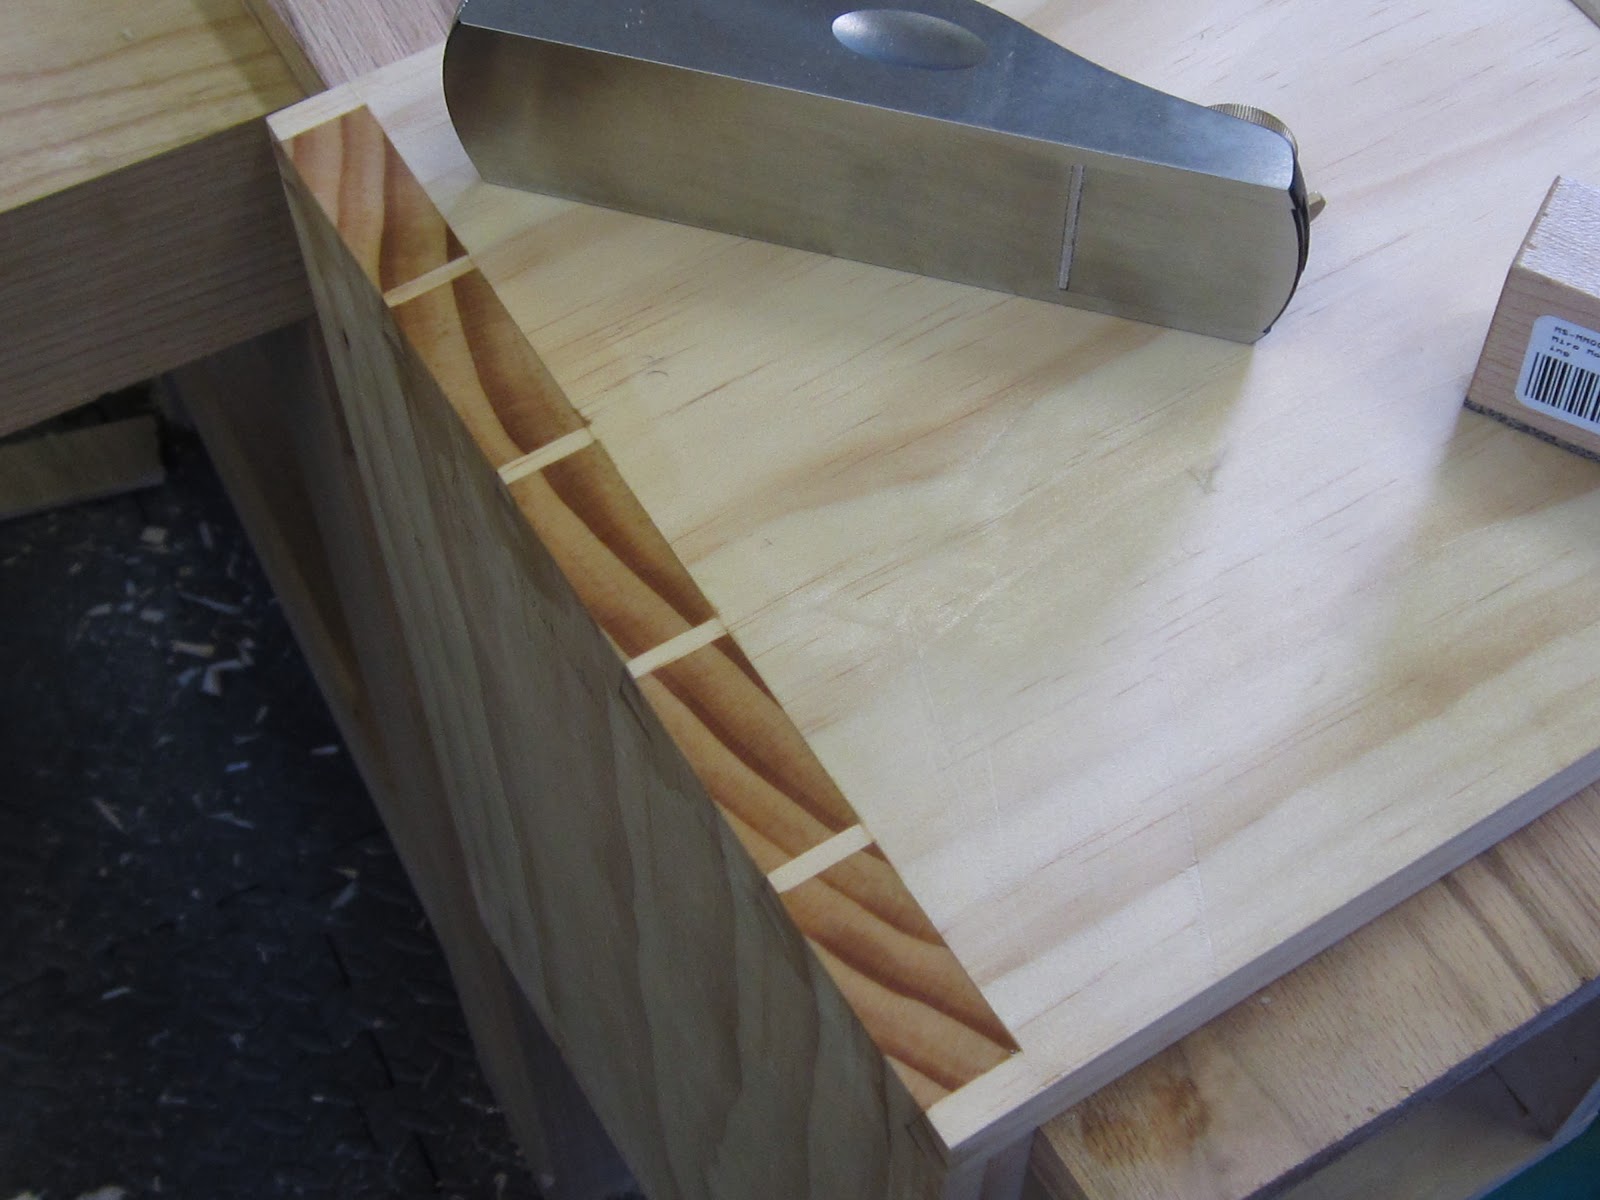
Here's a shot of the business end of the jig. The wider gap is where the dado blade passes. The jig allows you to control the distance between the dado blade as well as the width of the pins. 

The hardboard is what backs up the dado cut and is replaceable when you cut a different size dado.  So mission accomplished! Cannot wait to put it to use when I begin building the Saw Cabinet!

PS. John you are free to use this jig whenever you'd like. So you don't need to rush to build yours now!

Thursday, October 18, 2012

[Box Joint Jig] - Assembly Part I

I'm taking a class in basic cabinet making offered by a local vocational school. The class is allowed to bring in suggestions for their own projects. So I thought about it and came up with a project that I could get some use out of.

A little background. I have a real handsaw problem. Buying them that is. Over the last couple of years, I've acquired some fairly nice old saws. And some really great new saws. The issue is they have no home. To keep them safe, they are nestled away in the basement in make shift or original boxes. So every time I need to cut, it's a trip downstairs to unpack. Then re-pack after I'm done. So I could really use a Saw Till.

Wait a minute! What does this have to do with a Box Joint Jig, which is the title of the post? The Saw Till will need to be joined at its corners. Now my first inclination is to put my newly acquired skill of hand-cut dovetails to the test. But since I'm in the class, and we're working primarily on machines I decided that learning to cut box joints would be an interesting and attractive way to go. So I thought I'd build a box joint jig first, in order to build the Saw Till.

I looked at a bunch of box joint jigs and settled on one from Shop Notes. This one looked fairly flexible, although a little more complex than a throw away jig. But hey, it's all about the learning process. So I decided to take it on.

Shop Notes even offers the hardware needed  for the jig. So once I saw this I jumped on it.

I have to admit, buiding this jig has been a challenge. It's introducing me to a lot of things that I've never done before. One of these was to cut 1/4" slots to accept the bolts for the adjustment feature. Just cut 3 simple slots, easy. But not as easy as it looks.

I settled on using a router to cut them. So I needed to make yet another jig . Now I'm making jigs for making a jig. I hadn't anticipated having to do that.

The jig for cutting 1/4" slots.The palm router runs between the rails and stop blocks are set to define the end of the cut.


Here is the result.
So I'm about halfway done at this point.

The front piece is going to be the adjustable mechanism, which will fit in the back of the fence which is behind it

There are more challenging and new techniques yet to be explored with making this jig. Like cutting metal brackets and boring new holes for them. See you next time.  


Monday, October 8, 2012

[Schoolbox] - Dovetail Assembly

It's been a while since the last post. I've begun a night-class in Cabinet Making at a local vocational school. I figured the class would help boost my confidence and familiarity. With the table saw in particular. I'm much more comfortable with a hand-saw than a table saw.

The class is for beginners. Most have barely touched a hand-held drill. But that's fine by me. A really nice group who remind me of myself when I was just starting out. At least I get 3 hours of extra shop time during the week. But I've already learned some really neat ways to work quicker on the table saw, so it's paying off. I will be posting the project I selected for the class here soon.

So work on the Schoolbox has been a little slow since the class started. This post deals with the glue-up and assembly of the sides of the box. Overall the assembly went well. The joints are nice and tight, no major gaps that need special attention on the outside of the box.

What did surprise me were gaps on the inside of the box that appeared during final assembly. I'm not exactly certain why these appeared, but I have my theories. I might have cut the joints too snug. During dry assembly, I did need to drive the joints home a bit. When I applied the glue, the joint must have swelled moe than I would have thought it would.

No gaps are noticeable on the outside, but a slight hint of gaps on the inside. That's after rapping as hard as I thuhgt I could get away with without marrring this pine. I'm wondering how to hide this, so feel free to suggest if you know of a way. Some possible solutions might be to make a thin molding, perhaps if I shellac the inside of the box that might help. We'll see

So here are some shots of the dovetail assembly.
Just before glue-up


Here I am being super worried about getting the first corner square

A different angle of the first corner after glue-up


Two sides down. Did you notice that I planned it so that the grain wraps around the box?


Assembling the last two corners.


A little closer before trimming.  Not too bad

After cleaning up with a block plane. Now we're talking!


I like the way the rings make the tails look.
So next step is to dress the sides and attach the bottom of the box. Cannot wait to try traditional cut-nails on the bottom.  Thanks for looking!