Saturday, November 10, 2012

[Schoolbox] - Attaching the Bottom and the Quiet After the Storm

The Hurricane Sandy chaos has finally subsided a bit, and I'm able to take a break from feeding the gas generator. We were among the fortunate. The destruction just 15 minutes north and east of Freehold is truly frightful. We only lost a few trees and suffered some fence damage, and lost power for only 4 days. It seems frequent and violent storms are the new normal in the Northeast. This is the third time in 2 years we have lost power for multiple days. I learned with this storm that there is definately a type of fatigue that occurs from the stress of a situation. You don't even realize it when you're living it. For those who haven't seen the devistation along our shore. We hope everyone is safe and has a speedy recovery.


I counted my many blessings, put on some relaxing music, and dove back in to the Schoolbox. For just a little while I was able to forget about the destruction left by Sandy.

On to attaching the bottom to the sides. Now keep in mind this project is supposed to be built with 19th century methods. So attachment of the base is with hide glue and cut nails. Grain orientation of the bottom runs from front to back as discussed in "The Joiner" to account for seasonal swelling and shrinking. However, I went with a left to right grain orientation because I don't think this box will experience a variety of temperature changes. My air conditioning goes on in March and doesn't get turned off until November.

First step is to apply hide glue to the front and a bit down the sides of the bottom. This should allow for some expansion and contraction since the remainder of the bottom will be attached with traditional cut nails. At this stage the bottom is left proud of the sides and will be made flush with the sides after it is attached. 

You can just about make out the hide glue facing the front of the box


Clamping the bottom to the sides after gluing just the front


While the glue was setting up on the front, I began installing the cut nails. Here I'm using 4d headless brads that I was able to purchase in small quantity from Tools for Working Wood.  I carefully drilled pilot holes for these nails on the diagonal. Nailing on the diagonal is a way to get a little more strength.


Cut nails have a wedge and it's important to configure it to match the direction of the grain


Dividers are used to get exact spacing after the left-most and right-most nails are in 


Nails are angled for extra holding stremgth then nailed home with a nail set


Once the bottom was fastened, it's now time to get it flush with the sides. For end grain I made sure I had a good sharp blade and moistened the ends with denatured alcohol. 


A trick learned from Chris Schwarz. Using denatured alcohol to soften end grain makes planing it easier


Lastly, I used my Lie Nielsen Jack plane to clean up and flatten the outside of the box.


Lie Nielsen Jack plane made quick work of flattening the box

Tails look pretty good


Next step is to install a removable self inside the box. Thanks for looking.


Tuesday, October 23, 2012

[Box Joint Jig] - Final Assembly

Over the weekend I was able to complete the micro-adjustment feature on the Box Joint Jig. I have to admit, I never thought building a jig could be this complex, or this fun! There were many new techniques I'd never tried, and many challenges as well. All the better. Hopefully, I will get many good years out of this jig and the work I put into it will pay off.

First, I milled a small piece of hard Maple down to size. Believe it or not, this was a new skill learned. I'd never ripped anything down to 1/4" thickness on the table saw. I'm a hand tool guy! I would have ripped it by hand normally. But I'm going with the machine thing. A home-made (sacrifical) push stick was really handy to make this cut. Next I drilled holes on the drill press for the micro-adjustment mechanism as per the plan. 


I then marked the hole locations and made a simple square right-angle jig (another jig for making a jig) that I could attach to the Box Joint Jig in order to hold it upright on the drill press table for drilling holes for the micro-adjuster rods in the end grain. These holes need to be good and straight as they are 2" deep. 


A near disaster occurred when attempting to install the threaded inserts used to accept the threaded rod. The threaded insert has what looks to be a notch meant for a screwdriver, when in actuality its purpose is to allow the insert to seat itself straight. So I wound up installing it incorrectly the first time.Thank goodness when I flipped it the right way it went in straight and held properly.

I installed it the correct way by screwing the insert into the threaded rod and then then held it in place with a few nuts. I took the threaded rod and chucked it up in the drill press. Then, it was a simply a matter of aligning the pilot holes with the threaded inserts and using hand power and a little downward pressure to screw in the insert.   

Yet another skill learned.  

One other thing to keep in mind. If you order the hardware kit from Shop Notes, make sure you measure the length of the adjuster rods they give you. I spent "waaayyyy" too much time trying to figure out why the jig wasn't adjusting properly. It turned out the the adjustment rods that came with the kit were 2" longer than the length required. Once I cut them to the right size, no problems.

Here's a side view of the micro adjuster mechanism. Works beautifully.

And a shot of the back. The last step is to attach the jig to the miter gauge. I'll do that on the Saw Stop at class.
Here's a shot of the business end of the jig. The wider gap is where the dado blade passes. The jig allows you to control the distance between the dado blade as well as the width of the pins. 

The hardboard is what backs up the dado cut and is replaceable when you cut a different size dado.  So mission accomplished! Cannot wait to put it to use when I begin building the Saw Cabinet!

PS. John you are free to use this jig whenever you'd like. So you don't need to rush to build yours now!

Thursday, October 18, 2012

[Box Joint Jig] - Assembly Part I

I'm taking a class in basic cabinet making offered by a local vocational school. The class is allowed to bring in suggestions for their own projects. So I thought about it and came up with a project that I could get some use out of.

A little background. I have a real handsaw problem. Buying them that is. Over the last couple of years, I've acquired some fairly nice old saws. And some really great new saws. The issue is they have no home. To keep them safe, they are nestled away in the basement in make shift or original boxes. So every time I need to cut, it's a trip downstairs to unpack. Then re-pack after I'm done. So I could really use a Saw Till.

Wait a minute! What does this have to do with a Box Joint Jig, which is the title of the post? The Saw Till will need to be joined at its corners. Now my first inclination is to put my newly acquired skill of hand-cut dovetails to the test. But since I'm in the class, and we're working primarily on machines I decided that learning to cut box joints would be an interesting and attractive way to go. So I thought I'd build a box joint jig first, in order to build the Saw Till.

I looked at a bunch of box joint jigs and settled on one from Shop Notes. This one looked fairly flexible, although a little more complex than a throw away jig. But hey, it's all about the learning process. So I decided to take it on.

Shop Notes even offers the hardware needed  for the jig. So once I saw this I jumped on it.

I have to admit, buiding this jig has been a challenge. It's introducing me to a lot of things that I've never done before. One of these was to cut 1/4" slots to accept the bolts for the adjustment feature. Just cut 3 simple slots, easy. But not as easy as it looks.

I settled on using a router to cut them. So I needed to make yet another jig . Now I'm making jigs for making a jig. I hadn't anticipated having to do that.

The jig for cutting 1/4" slots.The palm router runs between the rails and stop blocks are set to define the end of the cut.


Here is the result.
So I'm about halfway done at this point.

The front piece is going to be the adjustable mechanism, which will fit in the back of the fence which is behind it

There are more challenging and new techniques yet to be explored with making this jig. Like cutting metal brackets and boring new holes for them. See you next time.  


Monday, October 8, 2012

[Schoolbox] - Dovetail Assembly

It's been a while since the last post. I've begun a night-class in Cabinet Making at a local vocational school. I figured the class would help boost my confidence and familiarity. With the table saw in particular. I'm much more comfortable with a hand-saw than a table saw.

The class is for beginners. Most have barely touched a hand-held drill. But that's fine by me. A really nice group who remind me of myself when I was just starting out. At least I get 3 hours of extra shop time during the week. But I've already learned some really neat ways to work quicker on the table saw, so it's paying off. I will be posting the project I selected for the class here soon.

So work on the Schoolbox has been a little slow since the class started. This post deals with the glue-up and assembly of the sides of the box. Overall the assembly went well. The joints are nice and tight, no major gaps that need special attention on the outside of the box.

What did surprise me were gaps on the inside of the box that appeared during final assembly. I'm not exactly certain why these appeared, but I have my theories. I might have cut the joints too snug. During dry assembly, I did need to drive the joints home a bit. When I applied the glue, the joint must have swelled moe than I would have thought it would.

No gaps are noticeable on the outside, but a slight hint of gaps on the inside. That's after rapping as hard as I thuhgt I could get away with without marrring this pine. I'm wondering how to hide this, so feel free to suggest if you know of a way. Some possible solutions might be to make a thin molding, perhaps if I shellac the inside of the box that might help. We'll see

So here are some shots of the dovetail assembly.
Just before glue-up


Here I am being super worried about getting the first corner square

A different angle of the first corner after glue-up


Two sides down. Did you notice that I planned it so that the grain wraps around the box?


Assembling the last two corners.


A little closer before trimming.  Not too bad

After cleaning up with a block plane. Now we're talking!


I like the way the rings make the tails look.
So next step is to dress the sides and attach the bottom of the box. Cannot wait to try traditional cut-nails on the bottom.  Thanks for looking!


Saturday, September 8, 2012

[Schoolbox] - The Half-Mortise Lock

In the last post, I began dovetailing the sides of the Schoolbox. Mission accomplished! All the corners are fit, and I'm pleased with the results. Are they perfect? Not by any stretch. But I think I'll be able to deal with the small errors that were made. I chose not to write about it beyond some helpful tips for dovetailing, but I'll post pics when I do the final assembly. I am also going to reserve special post for the most frustrating part of the box to date. The keyhole escutcheon.

So this post is dedicated to the installation of the half-mortise lock. I took a class not too long ago at the Philadelphia Furniture Workshop and my teachers (Mario Rodriguez and Alan Turner) have taught me well. I was able to recall some of the valuable lessons they passed on and apply them for this build. Install the lock prior to assembly. Always practice the install in the same thickness and material before the actual install. These were just a few of the many.

What I found interesting is how little information is out there about installing a half-mortise lock. Fine Woodworking had a decent article by Philip C. Lowe. I found a few online hardware retail sites that had decent instructions. And Woodcraft had a short video, but that's about it. All of them were helpful in parts, but seemed to be short on some of the details in one way or another. Even Chris Schwarz mentions that no one taught him how to install in "The Joiner". So this seems to be a skill with some common steps but adapted by the woodworker by trial and error. So I cut a sample pine board and worked out an approach.

So it is with my very limited prior experience, reading the scant number of articles I could find, and a few practice attempts that I present my method of installing a half-mortise lock. I'm sure there are many better ways to do it, but this one is mine. Please feel free to suggest better ways if you've got 'em.

First step that everyone seems to agree upon is to find the center of the box and mark in pencil. After this the steps begin to deviate. Do this on the front, top and back of the box front.


Marking the center of the box. This picture also shows the mark out for the lock body.
I cover that below.

Next I mark out for the width of the lock body. I do this by placing the lock on the top of the panel and aligning the key pin (or post) with the center line of the box front. Most instructions do remind you that some key pins are not in the center of some locks. So the lock is installed by centering the key pin.

With the key pin on the center line, I use a small combo square to lay out the width of the body assembly in pencil. In my practice attempts, I was overly concerned about getting this measurement super tight. However, too tight here meant I had trouble pulling the lock in and out for fitting. So I found that you can leave yourself a tiny bit of room here.

The key pin (or post) is used to center the key in the panel. Not the lock itself. With the post on the center line I use a small combo square to mark out the width of the lock body.

The next step is to mark the distance from the top of the box front to the key pin. I do this with my wheel gauge and make a mark on the back of the box front. This sets the location of the key hole. I use a scratch awl to mark the position of the keyhole and use the same diameter drill bit and drill the hole on the drill press.

At this point I also mark out for the width of the lip, which is the distance from the  back of the lock to the front of the lip.  
Marking out for where the top of the lock. This is one of the most crucial measurements. Take too much material here and the lock and box will not meet tightly. 

At this point I cut a series of relief cuts for the removal of waste for the lock body. This makes the waste removal much easier. In some references, the waste is removed by forstner bit, straight router bit, or directly by chiseling it out. I haven't tried these methods yet, but this one seems to work just fine.

A series of relief cuts to make waste removal easier.

It's important when paring out the waste that you continuously define the edges of the marked out area after a few paring passes.

I've defined the area to be pared out and continue to define that boundary every few paring passes.


Almost to the bottom for the lock body. At this point I switched to my small Lie-Nielsen router plane.

Once the lock body fits and the back plate and the lip fit snugly against the back and top AND the post fits in the pre-drilled hole, the next step is to mark them out and very carefully remove the waste. Enough for just the thickness of the back plate and lip. In my practice runs I tried a number of methods. The one that seemed to work best was to pare a sliver for the lip just to establish an edge and then switching to the router plane. The lip is fussy work, so go slowly and plan shop time when you are not in a hurry. The recess for the back plate should go very easily.


Here is the finished cutout. I seem to pick up alot of discoloration when using the router plane. However it was very easy to clean up with a few light passes with the block plane.


Here is the final product. A little gappy on the left hand side but I believe the fit to be tight enough with the human eye. This picture is more of a closeup.

Overall I think the locks fits pretty well. I will deal with the keyhole eschtcheon in the next post. Thanks for reading.

Saturday, July 21, 2012

[Schoolbox] Dovetailing Is Like My Golf Swing

Ok. So maybe I'm reaching a little bit with this analogy. But I'm going with it, and I'll try to make it work. In hitting a golf ball, it's what you do before actually making contact with the ball that determines a good shot from a bad one. How are you aligned? How far are you standing from the ball? Is your backswing too slow? Too fast? On the right plane?  You hit hundreds, if not thousands of shots that are off just a fraction of an inch, and all you can do is live with hopefully a reasonable result.

However, there are times when it all comes together and you connect with the ball perfectly. You hit it so well that it's effortless and nearly perfect. It's those few elusive great shots that keep you coming back. It's the perfect shot that golfers chase. But it starts with the attention to detail before you actually make contact that's the thing.

Preparing to chop out the waste between the first set of tails for the Schoolbox. I use a fret saw to saw out most of the waste between the tails, but I tend to play it safe and leave a bit too much waste still. My mallet is from Blue Spruce.

Dovetailing seems much the same for me. Like hitting a great shot, great dovetails are a result of careful attention to detail before attempting to fit the joint together. More attention to detail in layout, sawing, and chisel work leads to nice tight, gap free joint. Most times there is a slight gap here, or a little tear out there. You are happy with an acceptable result. But it seems every once and a while, everything comes together and you fit the joint together and it fits perfectly. Like Golfers, it's what woodworkers live for.

I've read many books and many articles on how to execute the dovetail joint. I've taken classes and practiced layout, sawing, and chisel work for many hours. I'm certainly not an expert, and learn a little something each time I cut a dovetail joint, but I know enough now to knock one together and make it come out ok to this point. And I'm not fast either! Nor do I care to be! I do this for enjoyment! Plain and simple!

I wont bore you with every detail of putting the joint together. There are plenty of resources out there if you're inclined to look them up. So what I thought I'd do is list a few tips and tricks that I've learned that work for me that might be of interest.

Tip #1. Start with square and flat stock.
Every reference you will read will mention this from the start. I've tried to overlook it from time-to-time in an attempt to get started faster, but it always seems to come back to bite me later on. Spend the little extra time it takes to make sure your boards are square and flat. You'll thank yourself later.

Tip #2. Invest in a quality Marking Gauge
In order to make clean and precise baselines for dovetails, you need a gauge that you can trust. I've used cheaper ones thinking that they're all the same. But then I tried the Tite-Mark Wheel Gauge and I'll never go back. The locking mechanism and micro-adjustment are well worth the investment.


 Tip #3. Use a Strop to Freshen Up Your Chisel Edges! Often!
When I began learning how to dovetail, I skipped this step. I was a bit of a snob about using a strop even though many recommended it. I thought it was way better to sharpen a chisel on the 8000 grit waterstone every time it needed it. Trust me, if you use a strop you'll be amazed at how quickly you can get a chisel cutting cleanly again without having to mess with sharpening jigs and waterstones. I was amazed at the difference in the quality of my chiseling with a strop. You will be too.  

Here's my sharpening strop which is nothing more than a piece of leather glued to a rectangle of mdf, with some diamond paste rubbed on it. I'll work until I sense the chisel isnt cutting easy and then take 10 swipes to freshen the bevel and then another 10 on the chisel flat. 

Tip #4. Treat youself to a good set of Dovetail Chisels and a Chip Carving Knife
Ok. So dovetail Chisels aren't really a necessity. You can get crisp, clean corners from other chisels for sure. But nothing beats a chisel made specifically for dovetailing. I highly recommend the dovetail chisels from Blue Spruce Toolworks. Expensive? Perhaps. Someone said "If you pay for quality tools once, you'll only have to cry once!" The Chip carving knife is indispensible in claening out the corners of the tails and pins. The one I use is from Pfeil


First completed tail board for the Schoolbox and my trusty Blue Spruce Dovetail Chisel and Chip Carving knife.

Tip #5. Use a task light to help with marking out pins
A bit hard to pick up, but if you look closely you can see a little bit of light shining at the bottom of the gaps for the pins. I forget now where I picked this trick up, but if you use a task light and shine it across and underneath the pin board, it's a very helpful reference to make sure you are aligned correctly before marking out for the pins. You are aligned when you see just the sligtest amount of light shining through. Works for me!
I'm using a task light to shine under and across the would-be joint when marking out for the pins. I find that using a task light is invaluable for seeing what you're doing. 

Tip #6. Use micro fine chalk powder to see the lines for your pins
I learned this tip from Alan Turner while attending Philadelphia Furniture Workshop. Spread a littler podwer with your finger on the pin board and it will ensure you have a clear line to saw to for your pins. This is especially helpful when working with darker species woods, but I've gotten into the habit of using it on everything.
Chalk powder to highlight the knife lines for the pins.


A bit tough to see, but you can pick up the chalk powder that has clearly  highlighted the marking lines for the pins.

Tip #7. Always mark out your waste!
Probably should be closer to Tip #1. But if you do this you almost never will need to recover from sawing on the wrong side of the line.


The waste is clearly marked so I won' cut into the wrong side of the line 

So there you have it. Some of the tips that hae helped me on the road to dovetailing. Everyone will have their own methods, but hopefully some of these you might think of  on your journey.

I'll end with a few more pics of the first corner of the Schoolbox

Cutting the pins in progress. So far so good I think. But you don't truly know until you fit it and hammer it home.

View of the first corner of the Schoolbox. I'm pleased with the fit.

Looking good. Only issue is the top corner of the bottom tail. I got a little blow out while fitting, Not to worry though. I picked up a new trick that I show you to fix that right up.
 
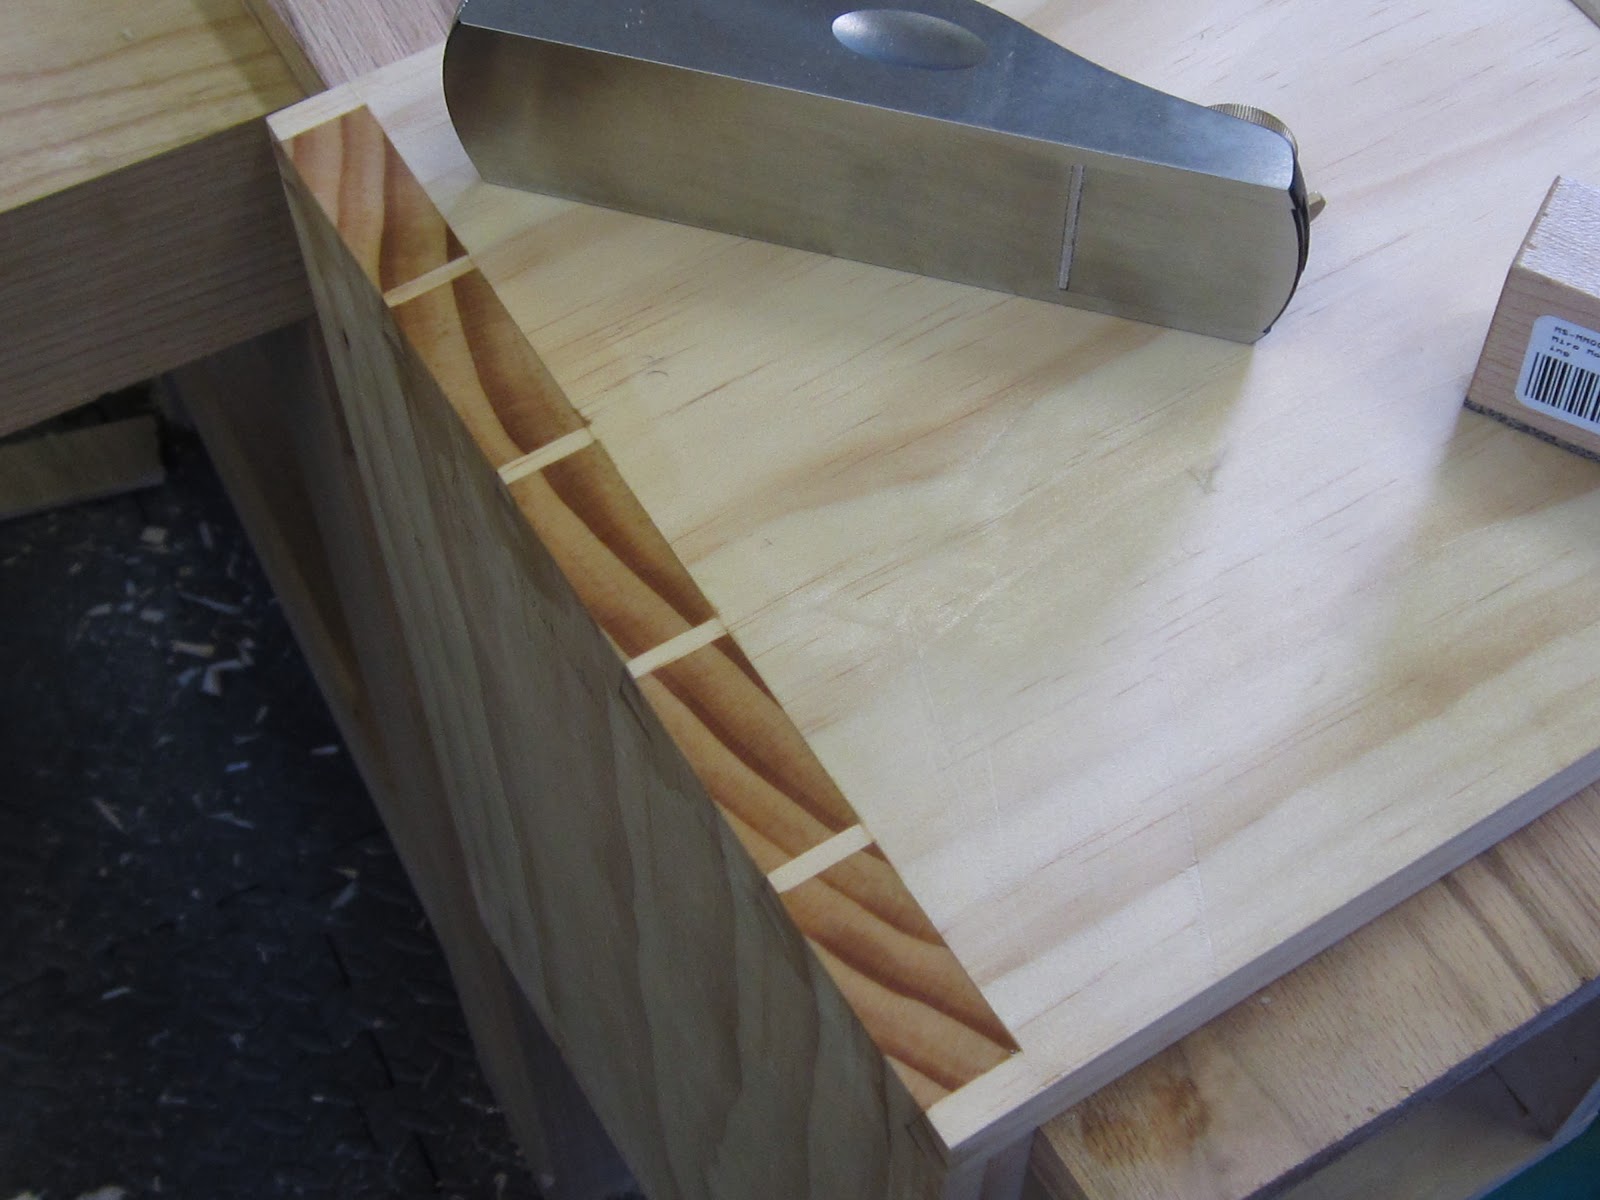
View of the pins, which are slightly proud. The fit is good and tight and I think will clean up very nicely when I get the box ready for finishing. 

So there you have it. The first dovetailed corner of the Schoolbox. And like my golf swing it's not perfect, but acceptable. However, I did feel a great sense of accomplishment when the corner fit snugly together.

Going forward I'll only write about interesting things that happen while completing the sides of the box. Only 3 more sides to go!